项目来自github上的50projects50days,用于巩固自己的CSS及JS基础,倒也挺有趣
需求
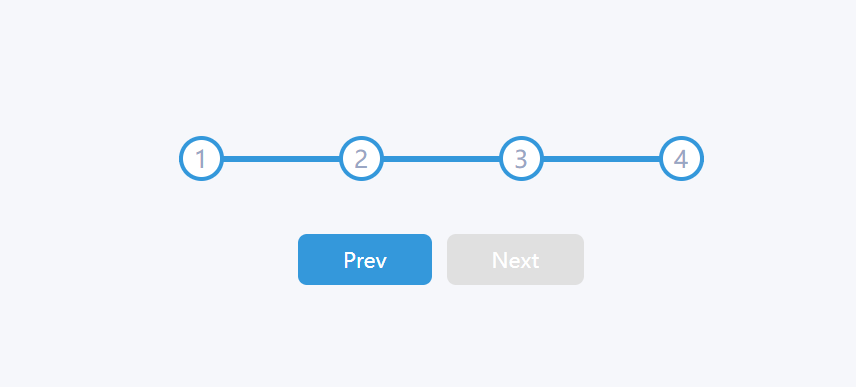
Progress steps需要制作一个步骤条,由两个按钮控制步骤前进后退,并且在边界条件按钮禁用
分析
应该算是一个非常常见的需求,其中最重要的就是中间步骤条的显示
我们可以很轻松的想到在JS中用一个数来纪录走过的步骤,但每个步骤之后的横线是一个问题
一开始想着对每个子项添加一个伪元素来显示横线,再添加定位处理,但是这样最后一个子项会多出一条横线较为麻烦
但是给子项的容器直接添加伪元素再通过定位移至中央就可以直接显示出来。
那么如何标记走过的路程呢?
需要在所有子项之前新加一项用来展示路迹,它的width可以先设置为0%
当我们点击按钮的时候,会对数据进行处理,如果超过长度则重置为最长,减小同理。在步骤增加的过程中通过forEach函数将节点下标与长度进行比较,小于长度的节点设置active样式,然后根据已有active样式的节点数量算出占据的长度来显示“痕迹”。
实现
1
2
3
4
5
6
7
8
9
10
11
12
13
14
15
16
17
18
19
20
21
22
23
24
25
26
27
28
29
30
31
32
33
34
35
36
37
|
<!DOCTYPE html>
<html lang="en">
<head>
<meta charset="UTF-8" />
<meta http-equiv="X-UA-Compatible" content="IE=edge" />
<meta name="viewport" content="width=device-width, initial-scale=1.0" />
<title>Document</title>
<link rel="stylesheet" href="style.css" />
</head>
<body>
<div class="wrap">
<div class="main">
<ul class="list">
<div id="line"></div>
<li class="active">1</li>
<li>2</li>
<li>3</li>
<li>4</li>
</ul>
<div class="btn">
<button id="prev" disabled>Prev</button>
<button id="next">Next</button>
</div>
</div>
</div>
</body>
<script src="./script.js"></script>
</html>
|
1
2
3
4
5
6
7
8
9
10
11
12
13
14
15
16
17
18
19
20
21
22
23
24
25
26
27
28
29
30
31
32
33
34
35
36
37
38
39
40
41
42
43
44
45
46
47
48
49
50
51
52
53
54
55
56
57
58
59
60
61
62
63
64
65
66
67
68
69
70
71
72
73
74
75
76
77
78
79
80
81
82
83
84
85
86
87
88
89
90
91
92
93
94
95
96
97
98
99
100
101
102
103
104
105
106
107
| * {
margin: 0;
padding: 0;
box-sizing: border-box;
}
:root{
--line-border-fill:#3498db;
--line-border-empty:#e0e0e0;
}
.wrap {
width: 100vw;
height: 100vh;
background-color: rgb(246, 247, 251);
font-family: 'Muli',sans-serif;
display: flex;
justify-content: center;
align-items: center;
overflow: hidden;
}
.list {
display: flex;
width: 350px;
justify-content: space-between;
position: relative;
max-width: 100%;
}
.list::before{
content: '';
background-color: var(--line-border-empty);
position: absolute;
top: 50%;
left: 0;
transform: translateY(-50%);
height: 4px;
width: 100%;
z-index: 0;
}
#line{
background-color: var(--line-border-fill);
position: absolute;
top: 50%;
left: 0;
transform: translateY(-50%);
height: 4px;
width: 0%;
z-index: 0;
transition: .4s ease;
}
ul li {
list-style: none;
width: 30px;
height: 30px;
border-radius: 50%;
background-color: #fff;
color: rgb(153, 166, 196);
display: flex;
justify-content: center;
align-items: center;
border: 3px solid var(--line-border-empty);
position: relative;
}
.active {
border: 3px solid var(--line-border-fill);
}
.btn {
margin-top: 30px;
display: flex;
justify-content: center;
}
button {
background-color: var(--line-border-fill);
color: #fff;
border: none;
font-size: 14px;
font-family: inherit;
border-radius: 6px;
padding: 8px 30px;
margin: 5px;
cursor: pointer;
}
button:active{
transform: scale(.98);
}
button:focus{
outline:0;
}
button:disabled {
background-color: var(--line-border-empty);
cursor: not-allowed;
}
|
1
2
3
4
5
6
7
8
9
10
11
12
13
14
15
16
17
18
19
20
21
22
23
24
25
26
27
28
29
30
31
32
33
34
35
36
37
38
39
40
41
42
43
44
45
46
47
48
49
50
|
let len = 1
let nextbtn = document.querySelector('#next')
let prebtn = document.querySelector('#prev')
let cirarr = document.querySelectorAll('li')
let progress = document.getElementById('line')
nextbtn.addEventListener('click', () => {
len++
if (len > cirarr.length) {
len = cirarr.length
}
update()
})
prebtn.addEventListener('click', () => {
len--
if (len < 1) {
len = 1
}
update()
})
function update() {
cirarr.forEach((circle, index) => {
if (index < len) {
circle.classList.add('active')
} else {
circle.classList.remove('active')
}
})
const actives = document.querySelectorAll('.active')
progress.style.width = ((actives.length - 1) / (cirarr.length - 1)) * 100 + '%'
if (len === 1) {
prebtn.disabled = true
} else if (len === cirarr.length) {
nextbtn.disabled = true
} else {
prebtn.disabled = false
nextbtn.disabled = false
}
}
|
总结
最重要的两个点在于:伪元素设置横条
foreach设置样式后动态设置长度